How to point your domain to your new hosting plan
Namecheap Instructions
- Navigate to www.namecheap.com/ and login into your account
- Once logged in, it will take you to your dashboard. If you only have one domain, it will be easy to find it on the dashboard. If not then on the left-hand side there will be an option that says “domain list” and you will see a list of domains

3. Once you see your domain on the right side of it, there will be a button that says “Manage”, click that

4. Navigate to Advanced DNS. At the bottom, there is an option for personal DNS next to register the nameserver, there is a button called Nameserver; click that. In the drop-down that appears, select NS1, and then in IP Address, put 167.172.19.154. Then push the button again and do the same thing, except instead of NS1 select NS2 this time.

5. Once you have done that step on the top navbar that got you to Advanced DNS, there is an option for Domain. Click that. Under nameservers, make sure the dropdown says custom DNS, then put ns1.<yourdomain> and ns2.<yourdomain>. Make sure to click the green checkmark that appears.

6. You are all set your domain should now be pointed at your new WordPress site!
Godaddy Instructions
- Sign in to your GoDaddy Domain Portfolio.
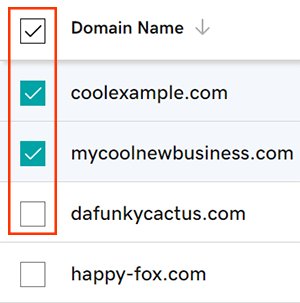
- Select the checkboxes next to the domains you’ll be updating. Or, select the checkbox next to Domain Name and then choose Select All.

- Select Nameservers from the action menu.
- Depending on your screen size, you may need to select the More menu and scroll down to see Nameservers.
- Choose the nameserver setting that works best for you:
- I’ll use my own nameservers: Enter your custom nameservers. Your DNS will be managed elsewhere and not through your GoDaddy account. NS1 and NS2 will be the same IP address of 167.172.19.154
- Select Save, then Continue to complete your updates.
- If your domain has Domain Protection, you’ll need to verify your identity. If you’ve had two-step verification (2SV) turned on for at least 24 hours, enter the code we sent via SMS, or enter the code from your authenticator app. Otherwise, enter the one-time password we sent to your registered email address.
You’ll see a Success confirmation that the nameservers have been updated. Most DNS updates take effect within an hour but could take up to 48 hours to update globally.
You should now have successfully pointed your domain to your new WordPress hosting with United Software Technologies. If you are still having issues, please reach out to our support here, and a team member will assist you.

